

This page contains code snippets. While they are verified to be safe to run, read through them fully and make sure you understand them before attempting to run them.
Install Exchange 2010 - Microsoft Servers Wiki
Install Exchange 2010
Exchange 2010 is Microsoft’s mail, calendar, and
“Unified Messaging” (which includes voicemail and auto-attendants for
phone calls) platform.
System Requirements for
Exchange
- AMD64 based CPU (Itanium is not supported)
- Server 2008 or 2008 R2
n * 4GB of RAM (where n is amount of roles
to install)- Page file of physical RAM size, plus 10mb for crash dumps
- At least 1.2GB of disk space to install Exchange (realistically
should have a lot more, mailboxes can fill up fast) [1]
Installation Instructions
To automatically install all built-in Windows prerequisites on 2008
R2 (skipping steps 2 and most of 13), you can use this PowerShell
snippet:
Import-Module ServerManager
Add-WindowsFeature NET-Framework,RSAT-ADDS,Web-Server,Web-Basic-Auth,Web-Windows-Auth,Web-Metabase,Web-Net-Ext,Web-Lgcy-Mgmt-Console,WAS-Process-Model,RSAT-Web-Server,Web-ISAPI-Ext,Web-Digest-Auth,Web-Dyn-Compression,NET-HTTP-Activation,RPC-Over-HTTP-Proxy -Restart
- Install .NET Framework 3.5 For 2008 R2, you can just enable the
feature in Server Manager For 2008, the offline installer is still
available from Microsoft Download or Legacy Update
- Install PowerShell v2
- 2008 R2 already has this preinstalled
- On 2008 install Powershell and WinRM 2.0 from Legacy Update
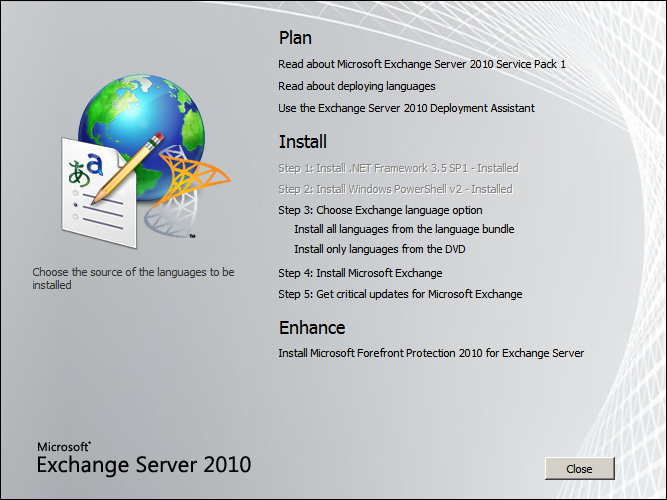
- Insert the Exchange Server 2010 install media and run the
installer
- Click Step 3: Choose Exchange language option, then click Install
only languages from the DVD
- Click Step 4: Install Microsoft Exchange
- Read and accept the license agreement
- No point in reporting errors to MS, just leave it off
- Select Typical Exchange Server Installation
- Specify the name for your organization (do not apply split
permissions)
- If you plan on using/allowing Exchange 2003 clients, select Yes for
creating a public folder database
- If you would like to enable the Outlook Web App, check The Client
Access server role will be Internet-facing, then specify the domain you
would like it accessible on (unless you’re going to create a DNS entry
afterwards, you can just point it to machinename.domain.tld)
- No point in joining CEIP, just leave it off
- The Exchange installer will now do a prerequisites check, which will
likely require you to manually install components. Install those as
necessary (i.e by clicking Add Role Services under Web Server), and if
it needs the Office 2010 Filter Packs you can get those from Microsoft
Download
- Once everything is installed, click Retry, then Next, and sit
back
Once everything finishes installing and the server reboots, there are
some additional tasks to do.
- To install a product key, click Server Configuration, then on the
right side click Enter Product Key…, otherwise the server will be in a
120-day trial mode.
- You’ll likely need to disable IPv6 in order for Exchange to function
properly. You can use the following registry key to do so:
Windows Registry Editor Version 5.00
[HKEY_LOCAL_MACHINE\SYSTEM\CurrentControlSet\Services\Tcpip6\Parameters]
"DisabledComponents"=dword:FFFFFFFF